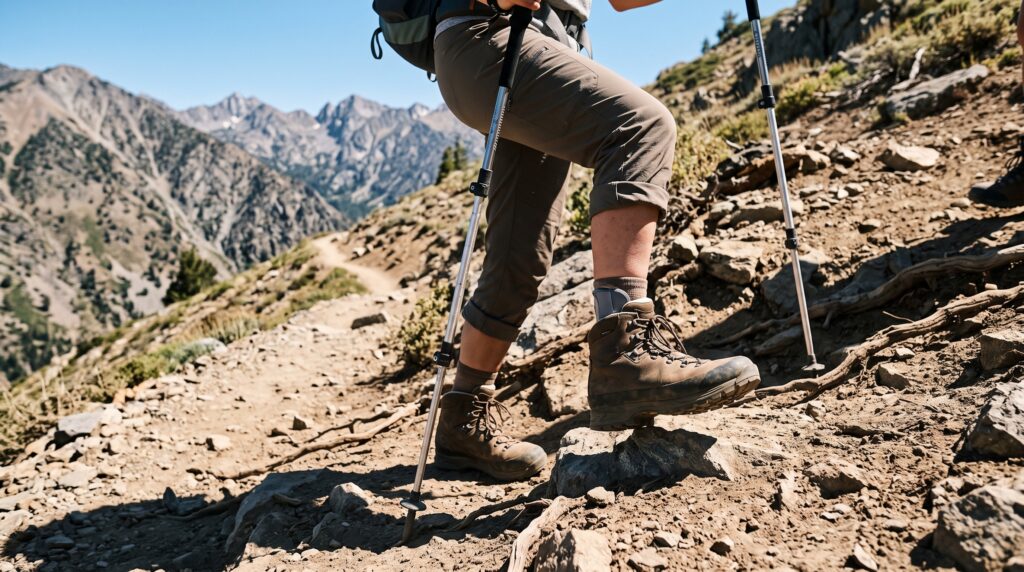
When you’re out on the trails enjoying nature, the last thing you want is an ankle injury to cut your adventure short. Ankle injuries account for approximately 40% of all hiking-related injuries, making them the most common mishap experienced by outdoor enthusiasts. Understanding how these injuries occur is your first line of defense in prevention, and it’s essential knowledge for anyone who regularly hits the trails.
The anatomy of your ankle is surprisingly complex, consisting of bones, ligaments, tendons, and muscles that work together to provide stability and mobility. When hiking, your ankles face constant challenges from uneven terrain, loose rocks, mud, tree roots, and sudden changes in elevation. Each step you take on unpredictable ground requires your ankle to make micro-adjustments, and when these adjustments happen too quickly or with too much force, injuries can occur.
Most ankle injuries during hiking fall into two categories: acute injuries and overuse injuries. Acute injuries happen suddenly, like when you roll your ankle stepping on a loose rock or landing awkwardly after a small jump. Overuse injuries develop gradually over time from repetitive stress, inadequate recovery, or biomechanical issues in your gait. Both types can sideline you from the activities you love, which is why learning how to prevent ankle injuries when hiking should be a priority for every outdoor enthusiast.
The Right Footwear Makes All the Difference
Your choice of hiking boots or shoes is perhaps the single most important decision you’ll make when it comes to ankle protection. The right footwear provides stability, support, and protection against the elements while allowing natural foot movement. Many hikers make the mistake of choosing boots based solely on appearance or brand name without considering their specific needs and the terrain they’ll be tackling.
For those wondering how to prevent ankle injuries when hiking, selecting appropriate footwear starts with understanding the different types available. Low-cut trail runners work well for experienced hikers on well-maintained trails who have developed strong ankles and good proprioception. Mid-cut boots offer a balance of ankle support and flexibility, making them ideal for moderate terrain and hikers who want some ankle protection without sacrificing too much mobility. High-cut boots provide maximum ankle support and are best suited for challenging terrain, heavy backpacking loads, or individuals with a history of ankle instability.
The fit of your hiking footwear is just as crucial as the style you choose. Your boots should feel snug around the heel and midfoot to prevent sliding, which can cause blisters and reduce stability. However, you need adequate room in the toe box to allow your toes to spread naturally and to accommodate foot swelling that occurs during long hikes. Always try on boots with the same socks you plan to wear hiking, and test them later in the day when your feet are slightly swollen to mimic trail conditions.
Features to Look for in Ankle-Protective Hiking Footwear
When shopping for hiking boots or shoes, certain features specifically contribute to ankle injury prevention. A stable heel counter keeps your heel locked in place and prevents excessive side-to-side movement that can lead to rolling your ankle. The shank, which is a supportive insert between the insole and outsole, provides torsional rigidity that protects your ankle from twisting on uneven ground.
Look for boots with a proper midsole that offers cushioning without being too soft, as excessive cushioning can actually reduce stability and proprioception. The outsole should have aggressive lugs in a pattern that provides multi-directional traction, allowing you to maintain your footing on various surfaces. Quality hiking footwear will also feature a protective toe cap and reinforced sides to guard against impacts from rocks and roots that could cause you to stumble.
Don’t overlook the importance of the lacing system when considering how to prevent ankle injuries when hiking. Boots with multiple lacing zones allow you to customize the fit at different parts of your foot and ankle. You can lace the lower portion loosely for comfort while tightening the upper laces for ankle support. Some modern hiking boots include quick-lacing systems that make it easy to adjust your fit on the trail as conditions change or your feet swell during the day.
Building Ankle Strength and Stability
Strong ankles are resilient ankles, and incorporating specific exercises into your routine is one of the most effective strategies for how to prevent ankle injuries when hiking. The muscles surrounding your ankle joint, including the peroneals, tibialis anterior, and gastrocnemius, work together to stabilize your ankle during the dynamic movements of hiking. When these muscles are weak, your ankle becomes more susceptible to rolling, spraining, or straining.
Balance exercises are particularly valuable because they improve proprioception—your body’s awareness of its position in space. Single-leg balance exercises force your ankle stabilizers to work harder and adapt to subtle shifts in your center of gravity, similar to what happens on uneven trail surfaces. Start by standing on one foot for 30 seconds to one minute, then progress to more challenging variations like closing your eyes, standing on an unstable surface, or performing small movements while balancing.
Resistance exercises target the specific muscles that protect your ankle from injury. Ankle alphabet exercises, where you trace the letters of the alphabet with your toe while keeping your heel stationary, work your ankle through its full range of motion. Resistance band exercises, including dorsiflexion, plantarflexion, inversion, and eversion movements, strengthen the muscles in all directions of ankle movement. Calf raises and toe raises build the larger muscles that support ankle function and absorb impact forces during hiking.
Dynamic Exercises That Mimic Hiking Movements
While static exercises build foundational strength, dynamic exercises that replicate hiking movements provide more functional benefits. Lateral hops challenge your ankle to stabilize quickly when you land, similar to stepping from rock to rock on a technical trail. Step-downs from a platform force your ankle to control your descent, much like navigating downhill sections of trail where ankle injuries are particularly common.
Plyometric exercises like box jumps and jump rope can improve the reactive strength of your ankle stabilizers, though these should be approached progressively and only after building a solid base of strength. Walking on uneven surfaces—whether on a balance board, foam pad, or actual trails—trains your ankles to adapt quickly to changing terrain. For busy parents juggling multiple responsibilities, the good news is that many of these exercises can be performed in just 10-15 minutes, several times per week, and can even be done while watching your kids play.
Consider incorporating functional movement patterns that combine ankle strength with total body coordination. Walking lunges with rotation, single-leg deadlifts, and lateral shuffles all require significant ankle stability while building overall leg strength. These compound movements prepare your body for the real-world demands of hiking better than isolation exercises alone, and they’re time-efficient for those with packed schedules.
Proper Hiking Technique and Body Mechanics
Even with strong ankles and quality footwear, poor hiking technique can significantly increase your injury risk. The way you position your feet, distribute your weight, and move through challenging terrain all play crucial roles in how to prevent ankle injuries when hiking. Many hikers develop bad habits over time without realizing these patterns are setting them up for injury.
Your foot placement should be deliberate rather than haphazard, especially on technical terrain. Look several steps ahead to plan your route and identify stable footing before committing your weight to each step. Aim to land with your foot flat or slightly heel-first on stable surfaces, avoiding pointed rocks or loose ground when possible. Stepping with your full foot, rather than just the heel or ball, distributes forces more evenly and provides better stability.
When navigating uneven terrain, maintaining a slight bend in your knees keeps your center of gravity lower and allows your legs to act as shock absorbers. Locked knees transfer more impact force to your ankles and increase the likelihood of losing your balance. Keep your core engaged to maintain stability, and use your arms for balance when necessary—there’s no shame in using your hands on particularly challenging sections.
Descending Techniques for Ankle Protection
Downhill hiking presents the greatest risk for ankle injuries, as gravity increases the forces acting on your joints and the tendency to pick up speed reduces your control. When descending, take smaller steps rather than long strides that require your ankle to absorb more impact. Keep your weight slightly back but centered over your feet, and resist the urge to lean too far forward, which increases the risk of tripping.
Use a zigzag pattern on steep descents rather than heading straight down whenever possible. This technique, called switchbacking, reduces the grade you’re navigating at any given moment and decreases the stress on your ankles and knees. When you must step down from a high obstacle like a large rock or log, step down with your stronger leg first and use it to control your descent rather than dropping down with both feet simultaneously.
Trekking poles are invaluable tools for reducing ankle injury risk during descents and throughout your hike. They transfer some of your body weight to your upper body, reducing the load on your ankles by approximately 20-30%. Poles also provide additional points of contact with the ground, improving your stability and allowing you to test questionable footing before committing your full weight. For parents hiking with children, poles can also be useful for helping kids navigate tricky sections while protecting your own joints in the process.
Conditioning and Preparation Before Your Hike
Jumping into a challenging hike without proper preparation is one of the fastest ways to end up with an ankle injury. Your body needs time to adapt to the specific demands of hiking, especially if you’re attempting terrain that’s more difficult than what you’re accustomed to. A structured preparation plan is essential for understanding how to prevent ankle injuries when hiking and ensuring your outdoor adventures remain enjoyable rather than painful.
Progressive overload is the principle that should guide your hiking preparation. Start with shorter hikes on easier terrain and gradually increase either the distance, elevation gain, or technical difficulty—but not all three at once. Your ankles need time to adapt to the stresses of hiking, and this adaptation occurs during recovery periods between hikes. If you’re new to hiking or returning after a long break, give yourself at least 4-6 weeks of progressive training before attempting your goal hike.
Cross-training activities complement your hiking-specific preparation and address fitness components that directly impact ankle injury risk. Running or walking on varied terrain builds cardiovascular endurance while strengthening ankle stabilizers. Cycling develops leg strength without the impact stress of hiking, making it ideal for recovery days. Swimming and water aerobics provide resistance training that builds strength while minimizing joint stress, perfect for busy parents who can exercise while their kids take swim lessons.
The Importance of Flexibility and Mobility
Tight muscles and restricted joint mobility increase your risk of ankle injury by limiting your ankle’s ability to move through its full range of motion. When your ankle can’t adapt to uneven ground because of flexibility restrictions, the forces that should be absorbed through motion instead stress the ligaments and other structures, increasing injury risk. Regular stretching and mobility work should be non-negotiable components of your hiking preparation.
Focus on stretching your calves, hip flexors, hamstrings, and quadriceps, as tightness in any of these muscle groups can alter your gait mechanics and place additional stress on your ankles. Hold static stretches for 30-60 seconds after your workouts or hikes when your muscles are warm. Dynamic stretching before hiking—movements like leg swings, walking lunges, and ankle circles—prepares your muscles and joints for activity without reducing power output the way static stretching can.
Foam rolling and self-myofascial release techniques can address muscle tightness and improve tissue quality throughout your lower legs. Roll your calves, shins, and the bottoms of your feet regularly to release tension and improve mobility. These self-care practices take just 5-10 minutes and can be done while watching TV, making them realistic for time-crunched individuals trying to balance fitness with family and work responsibilities.
Trail Selection and Environmental Awareness
Choosing appropriate trails for your current fitness level and experience is a critical but often overlooked aspect of how to prevent ankle injuries when hiking. Pride and ambition can lead you to attempt hikes that exceed your current abilities, significantly increasing injury risk. Being honest with yourself about your capabilities and selecting trails accordingly isn’t a sign of weakness—it’s smart risk management that allows you to enjoy hiking for years to come.
Research trails before you go, paying attention to reviews and trip reports that mention trail conditions, technical difficulty, and recent hazards. Trail rating systems provide general guidance, but individual trails rated at the same level can vary significantly depending on factors like elevation gain, terrain type, and trail maintenance. Look for specific information about rocky sections, water crossings, or other features that could challenge your ankle stability.
Weather and seasonal conditions dramatically affect trail difficulty and ankle injury risk. Wet rocks and roots become slippery, increasing the chance of your foot sliding out from under you. Mud can hide unstable footing or create suction that pulls your foot in unexpected directions. Snow and ice obviously create treacherous conditions that require specialized equipment and skills. Check recent trail conditions through local hiking groups or trail apps, and don’t hesitate to choose an alternative route if conditions are questionable.
Staying Alert and Managing Fatigue
Mental fatigue and distraction are significant contributors to ankle injuries on the trail. When you’re tired, your reaction time slows, your coordination decreases, and you’re more likely to make poor decisions about foot placement. Most hiking injuries occur later in the day when fatigue has accumulated, not during the fresh early miles. Recognizing this pattern and adjusting your behavior accordingly is key to injury prevention.
Take regular breaks to rest, hydrate, and refuel before you’re completely exhausted. Pushing through extreme fatigue might feel productive, but it compromises your form and increases injury risk exponentially. Listen to your body and don’t be afraid to turn back if you’re feeling overly tired, even if you haven’t reached your planned destination. There will always be another day to complete that hike, but recovering from an ankle injury can take weeks or months.
Stay present and focused while hiking, especially on technical terrain. Resist the urge to check your phone frequently or become lost in thought to the point where you’re not paying attention to foot placement. If you’re hiking with others, save extended conversations for breaks or easy sections of trail where you can walk side-by-side safely. For parents hiking with children, this balance can be challenging, but teaching kids to stay focused on the trail also models good hiking practices they’ll carry into adulthood.
Using Supportive Gear and Accessories
Beyond proper footwear, various gear items and accessories can provide additional protection against ankle injuries. Ankle braces or supports offer external stability for hikers with previous ankle injuries or chronic instability. These devices come in various designs, from simple sleeve-style braces that provide compression and proprioceptive feedback to more rigid braces that restrict excessive ankle motion while still allowing normal walking.
If you have a history of ankle sprains, wearing a lace-up or semi-rigid ankle brace during hikes can reduce your risk of re-injury by up to 50%. However, relying solely on external support without addressing underlying strength and stability deficits is not a long-term solution. Use braces as a tool while working to build the strength and coordination that will eventually allow you to hike confidently without them.
Trekking poles deserve special mention as one of the most effective pieces of equipment for ankle injury prevention. Beyond reducing joint loading and improving stability as mentioned earlier, poles encourage you to maintain a steadier pace and more controlled movements. They’re particularly valuable for hikers carrying heavy packs, where the additional weight increases the forces acting on your ankles and raises the consequences of a misstep.
Choosing and Using Trekking Poles Effectively
Selecting the right trekking poles involves considering factors like adjustability, weight, grip style, and shock absorption. Adjustable poles allow you to change their length based on whether you’re ascending, descending, or traversing, optimizing their effectiveness throughout your hike. Carbon fiber poles are lighter than aluminum but also more expensive and potentially less durable if you’re hiking rough terrain where poles might get wedged between rocks.
Proper pole technique maximizes their ankle-protective benefits. On flat terrain, plant your poles with opposite arm and leg movements, like you’re cross-country skiing. When ascending, shorten your poles and plant them ahead of you to help pull yourself up. On descents, lengthen your poles and plant them ahead and to the side, using them to slow your momentum and test footing before committing your full weight.
Gaiters are another accessory that indirectly prevents ankle injuries by keeping debris out of your boots. When small rocks, sand, or sticks get inside your footwear, they can cause hot spots, alter your gait, or create distractions that take your focus away from foot placement. Gaiters seal the gap between your boots and lower legs, preventing these irritants from entering and allowing you to maintain proper form throughout your hike.
Recognizing Warning Signs and Knowing When to Stop
Understanding the early warning signs of potential ankle injury allows you to take preventive action before a minor issue becomes a major problem. Subtle changes in how your ankle feels during a hike often indicate that you’re pushing your limits and need to adjust your approach. Learning to read these signals is an essential skill for anyone serious about how to prevent ankle injuries when hiking.
Pain is the most obvious warning sign, but not all pain means the same thing. Sharp, sudden pain often indicates acute injury and should be taken seriously immediately. Dull, achy pain that develops gradually might indicate fatigue or overuse but can often be managed with rest and modifications. Swelling during or after a hike suggests inflammation and should not be ignored, especially if it’s asymmetric or accompanied by significant pain.
Changes in your ankle stability or proprioception are subtle but important warning signs. If you notice you’re rolling your ankle repeatedly, even slightly, or if your ankle feels “weak” or like it might give out, these sensations indicate fatigue or compromised stability. Continuing to push through these feelings significantly increases your risk of a more serious injury. Similarly, if you’re stumbling more frequently than usual or your coordination feels off, your body is telling you it needs rest.
Immediate Response to Ankle Discomfort
When you first notice ankle discomfort or unusual sensations during a hike, stop and assess the situation rather than pushing through. Remove your boot if possible and check for visible swelling, bruising, or deformity. Gently move your ankle through its range of motion to identify specific movements that cause pain. This information will help you decide whether you can continue with modifications or need to turn back.
If you choose to continue hiking after experiencing ankle discomfort, reduce your pace significantly and focus on careful foot placement. Tighten your boot lacing to provide additional support, and use trekking poles if you have them or improvise a walking stick from a sturdy branch if you don’t. Choose the easiest route possible, even if it means taking a longer but less technical path back to the trailhead.
Consider carrying a basic first aid kit that includes an elastic wrap and instant cold pack specifically for ankle injuries. If you experience a mild ankle roll or strain, wrapping the ankle for compression and applying cold therapy can reduce swelling and provide support for your exit from the trail. Anti-inflammatory medication like ibuprofen can help manage pain and inflammation, though it shouldn’t be used to mask serious injury and continue hiking.
Recovery and Post-Hike Care
What you do after your hike is just as important as what you do during it when it comes to preventing ankle injuries. Proper recovery practices allow your ankles to adapt to the stress of hiking, become stronger, and be ready for your next adventure. Neglecting recovery is a common mistake that leads to overuse injuries and decreased performance over time, particularly for busy individuals trying to fit hiking around work and family commitments.
Immediately after finishing your hike, take time to cool down rather than abruptly stopping all movement. Walk at an easy pace for 5-10 minutes to allow your heart rate to decrease gradually and help flush metabolic waste products from your muscles. Once you’ve stopped moving, perform gentle stretches focusing on your calves, ankles, and other lower body muscles that worked hard during your hike.
Elevating your legs and feet for 15-20 minutes after hiking helps reduce swelling and promotes circulation. If you have access to both ice and heat, contrast therapy—alternating between cold and warm water immersion—can enhance recovery, though cold therapy alone is also beneficial. Pay attention to any areas of soreness or tightness in your ankles and lower legs, addressing these with additional stretching, foam rolling, or massage as needed.
Building Recovery Into Your Hiking Schedule
Progressive hikers need progressive recovery, meaning the more challenging your hike, the more recovery time you need before your next demanding outing. A general guideline suggests taking at least one full rest day between moderate hikes and two or more days after particularly long or challenging adventures. This doesn’t mean you must be completely sedentary, but your activities should be lower intensity and lower impact than hiking.
Active recovery activities like easy walking, gentle yoga, or swimming can actually enhance recovery by promoting blood flow without adding significant stress to your ankles and joints. These activities are particularly valuable for parents who want to stay active with their children while allowing their bodies to recover from weekend hiking adventures.